

Create and set up a Minecraft Bedrock server
With this guide, you set up a Minecraft Bedrock server that your friends can play on with a phone, tablet or Windows PC. You manage the allowlist, add-ons, worlds and the server version in the panel with a few clicks – without editing files by hand.
What you need
- Minecraft (Bedrock Edition) on every device that should play.
- A Microsoft account with a Gamertag for each player.
- A plan with at least 2 GB RAM. More helps with large worlds, many add-ons or many players.
1. Select Bedrock when you buy
- Open the configurator and choose your plan.
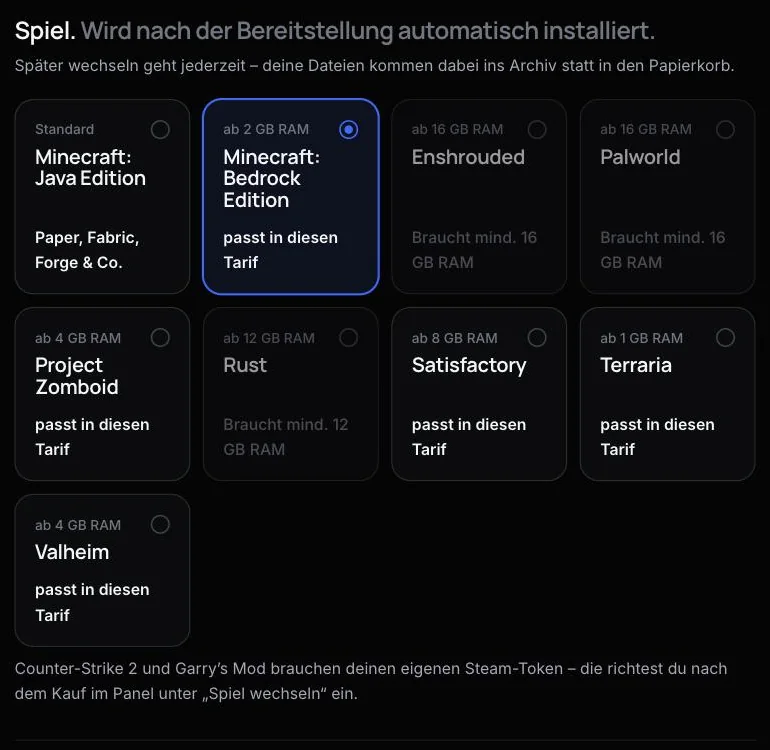
- In the configurator, section Game, choose the Minecraft: Bedrock Edition card and complete the order.
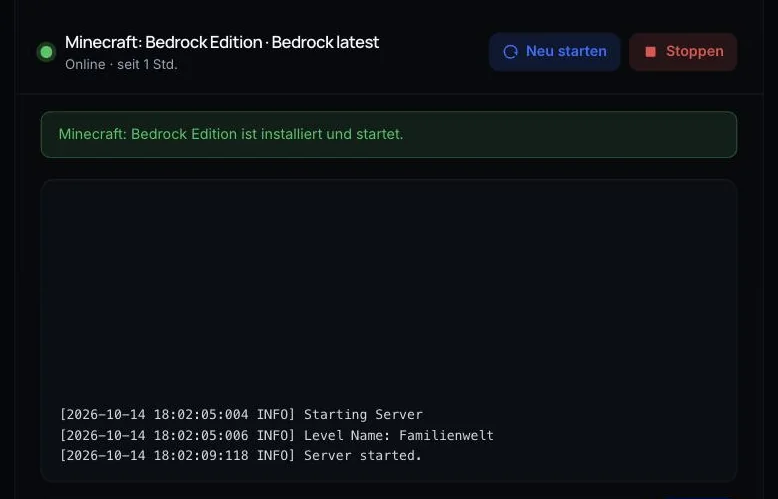
After provisioning, AeonHost installs the official Bedrock Dedicated Server in the latest version and starts it. In the Quick controls in the customer area, you can see the status and the console.
2. Connect to the server
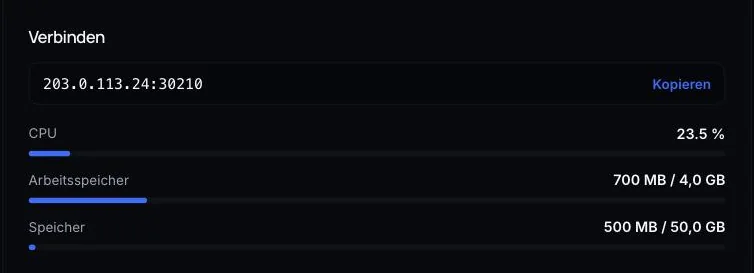
The address and port are on the Connect card in Quick controls.
- Open Minecraft and tap Play.
- Switch to the Servers tab and select Add Server.
- Enter any name, then the Server Address (IP) and the Port from the Connect card.
- Save and join.
Bedrock's default port is 19132, but the port on your card is always the one that counts. With an own domain, you give your friends an address that is easy to remember.
Consoles: On Xbox, PlayStation and Switch, you can't enter a custom server address. There are workarounds from third parties that change the console's network settings – only use them if you trust them.
Java players can't connect directly to a Bedrock server. The other way round works: a Java server with Geyser lets Bedrock players in. See Playing Java and Bedrock together.
3. Basic settings
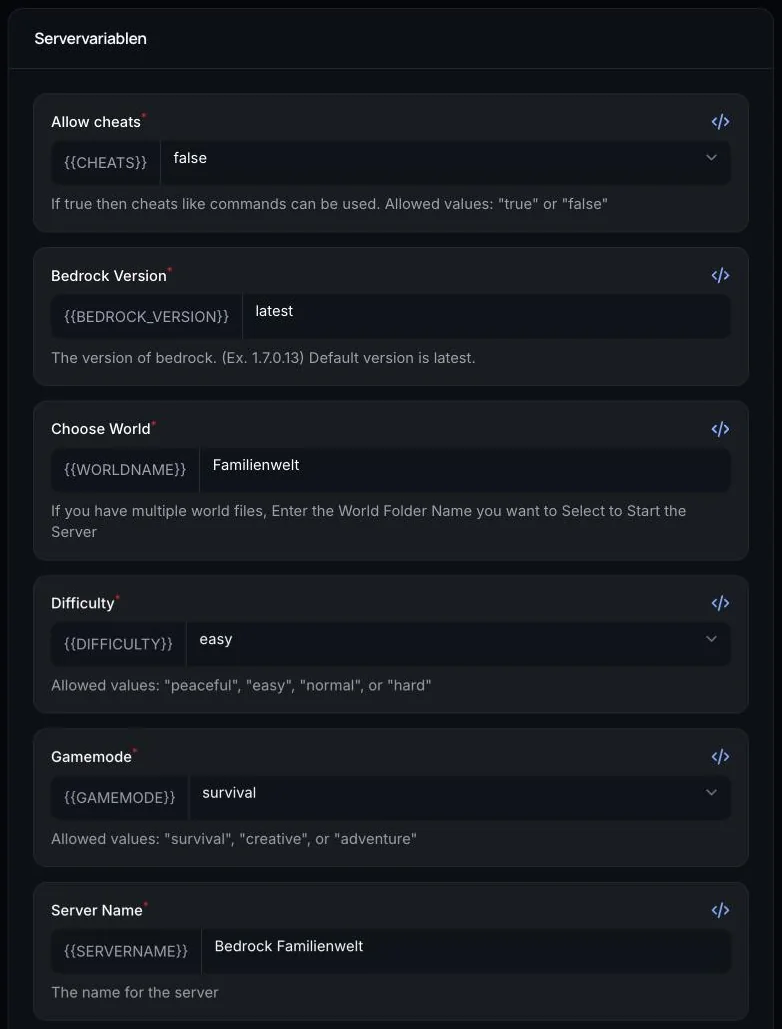
In the customer area, on your server's page, click Open in Panel. Under Startup you'll find the most important variables: Server Name, Gamemode, Difficulty, Allow cheats and Choose World (the active world).
The more convenient option is the Einstellungen (settings form) menu. There you set the same values and more, as a form – for example Maximale Spieler (max players), Sichtweite (view distance), Simulationsdistanz (simulation distance), Rechte neuer Spieler (permissions for new players) and Inaktive kicken nach (Minuten) (kick inactive players after this many minutes). The panel automatically syncs the fields that also appear under Startup. Changes take effect after a restart.
Tip: a smaller Sichtweite noticeably eases the load on the server when many people play at once.
4. Players and allowlist
In the Spieler (Players) menu, you can see who is online right now and control who is allowed to join at all.
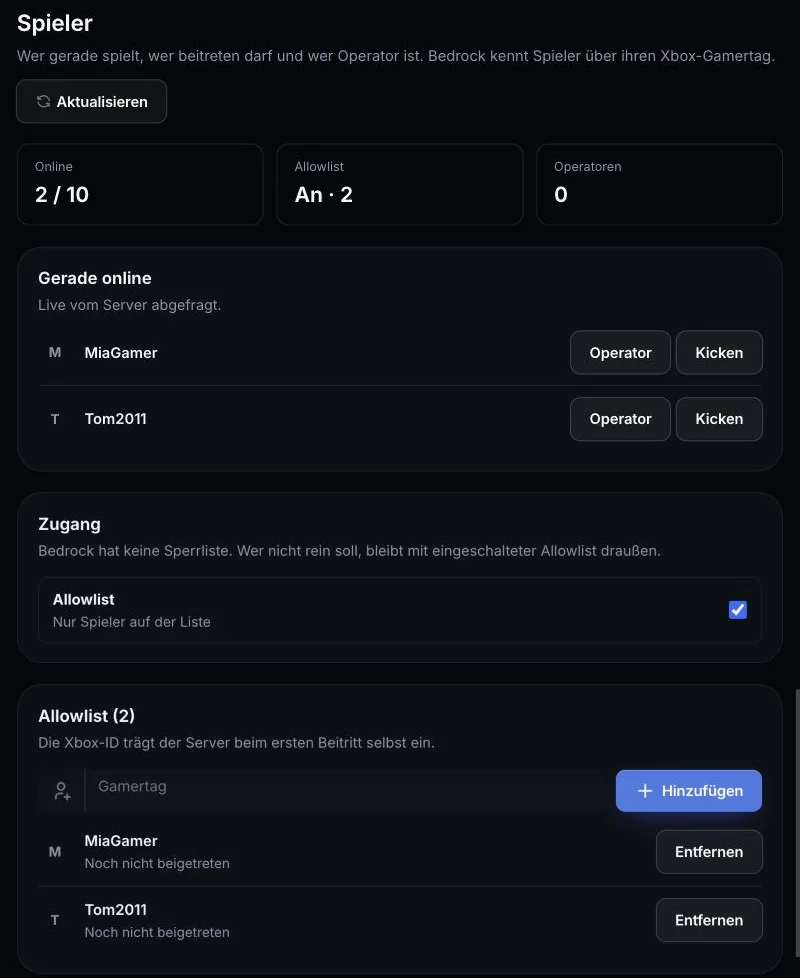
- Allowlist: Turn it on and add your friends' Gamertags under Zugang (access) with Hinzufügen (add). The server adds the Xbox ID itself on first join.
- Operator: A player becomes an operator while they're online – under Gerade online (online now), click Operator next to the player. Use Rechte entziehen (revoke rights) to take the role away again.
- Kicken (kick): removes a player from the server.
Bedrock has no ban list. Anyone who shouldn't be on the server simply stays out while the allowlist is switched on. More on this: Setting up a whitelist or allowlist.
5. Install add-ons
- Upload the
.mcpack,.mcaddonor.zipfile to the main folder under Files. - Open the Add-ons menu. The file appears under Add-on installieren (install add-on) – click Installieren (install).
- Restart the server.
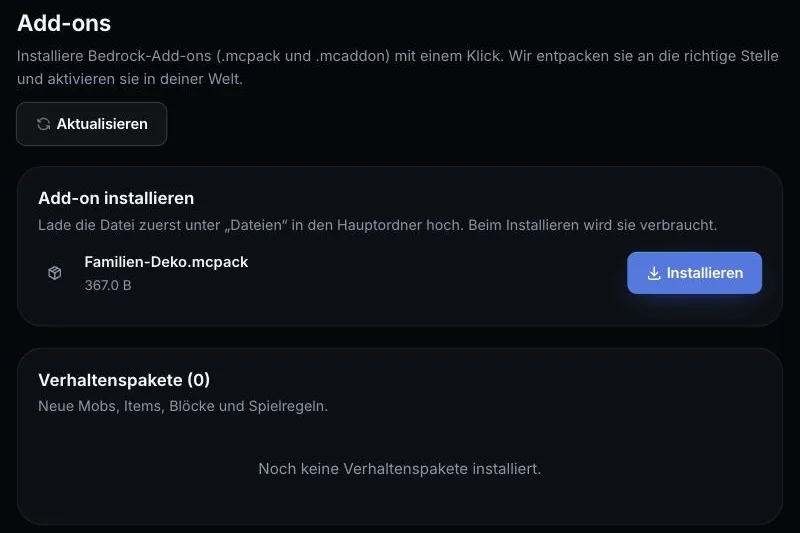
AeonHost extracts the add-on to the right place and activates it in your world; the uploaded file is used up in the process. Under Add-ons, you can remove it again later. Two limits of Bedrock: some add-ons need "Experimental Features", which can only be switched on in the game (download the world, enable the setting in the game, then import the world again). Skins and world templates don't work on servers.
6. Manage and import worlds
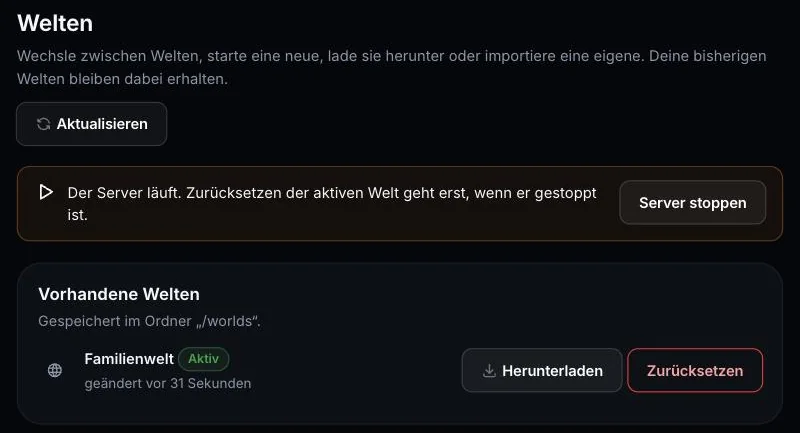
In the Welten (Worlds) menu, you switch between worlds, create a Neue Welt (new world) with a name and an optional seed, download worlds as .mcworld files, or import your own.
Import your own world:
- Export the world in Minecraft as a
.mcworldfile (in the world settings, under Export World). - Upload the file to the main folder under Files.
- Select it under Welt importieren (import world), enter a name and click Importieren (import).
- Click Aktivieren (activate) on the new world and restart the server.
You can only reset the active world while the server is stopped. Download it first if you want to keep it.
7. Version after a Minecraft update
Bedrock players can only join a server with their own version. The Version menu shows you which version is running and which is the latest from Mojang. After a Minecraft update:
- Under Version wählen (choose version), leave Immer neueste (always latest) selected (recommended).
- Click Vorher Backup erstellen (create a backup first).
- Tick Verstanden (understood) and click Neueste Version installieren (install latest version).
The server stops briefly and is reinstalled. Worlds, add-ons, allowlist, operators and settings are kept. With Bestimmte Version (specific version), you keep the server on an older version – for example, for an add-on that hasn't been updated yet. Note: an older version can't open newer worlds.
8. Backups
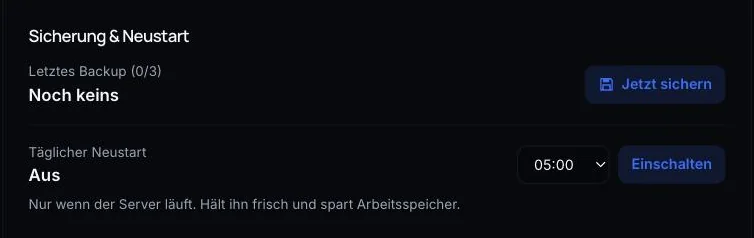
Use Back up now in Quick controls, or Backups in the panel, to back up the entire server. On the same card, you set up a daily restart.
Common problems
"Outdated server" or "Outdated client"
The server and the device have different versions. If the server is older, update it under Version. If the device is older, update Minecraft on the device.
A friend can't get in despite the allowlist
Check the Gamertag for typos, including spaces. They must be signed in with exactly this Microsoft account.
My add-on doesn't work
Restart the server after installing. If the add-on needs experimental features, you must switch them on in the game for the world (see step 5). Also check whether the add-on matches the current Bedrock version.
The old world loads after the import
The imported world isn't active yet. Under Welten, click Aktivieren for it and restart.
Further reading
Did this guide help? We are happy to help personally.