

Create and set up a Project Zomboid server
With this guide, you set up a Project Zomboid server where your group survives together in Knox County – with your own rules, Workshop mods and admin rights. You choose the game when you buy; AeonHost takes care of the installation and the ports.
What you need
- Project Zomboid on Steam for you and your co-players.
- A plan with at least 4 GB RAM. With many mods or players, plan for more.
- For mods: the Workshop IDs and mod IDs (see step 5).
1. Choose Project Zomboid when you buy
- Open the configurator and choose your plan.
- In the Game section, select the Project Zomboid card and complete the order.
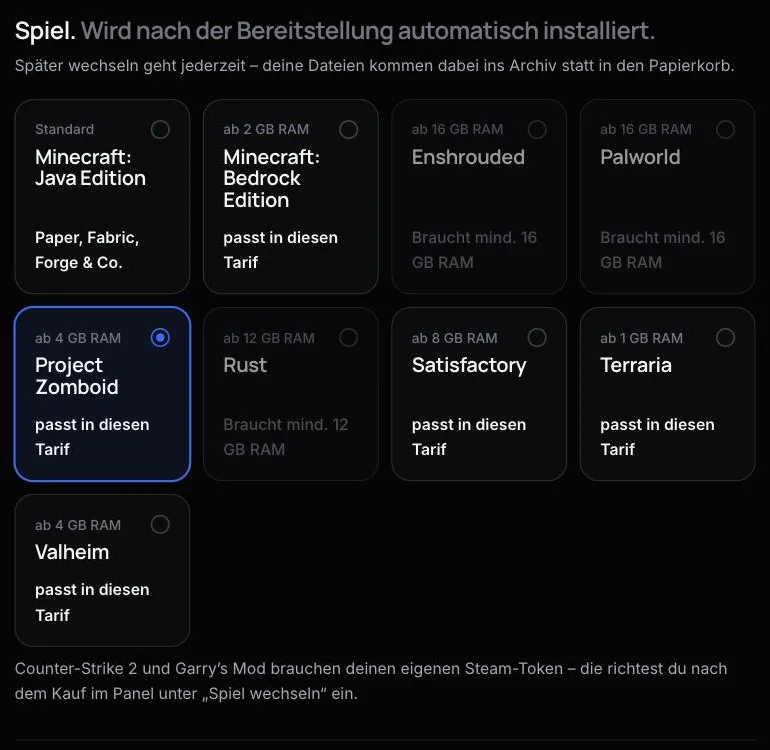
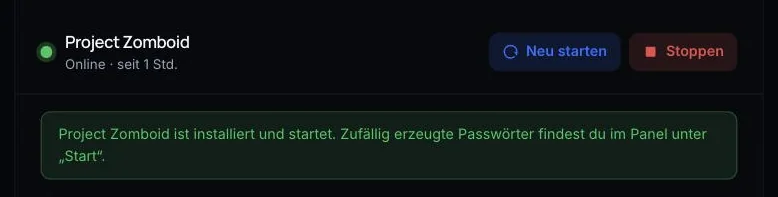
After provisioning, AeonHost installs the dedicated server and starts it. This creates an admin account with a random password. The Quick controls in the customer area show you when everything is ready.
2. The fields under “Startup”
In the customer area, click Open in Panel on your server's page and choose Startup on the left:
- Server Name – the server's internal name. The settings files and the save game are named after it. Letters and digits only, no spaces.
- Admin Username and Admin Password – access to the admin account. The default user is
admin; AeonHost generated the password randomly during setup. - Steam Auto Update –
1downloads the latest server version on start. The default is0. Set it to1so the server doesn't fall behind after a game update. - SteamPort – a second port the server needs. AeonHost assigned it automatically. Don't change it.
- Steam Beta Branch – leave empty for the standard version. Switching branches requires a reinstall.
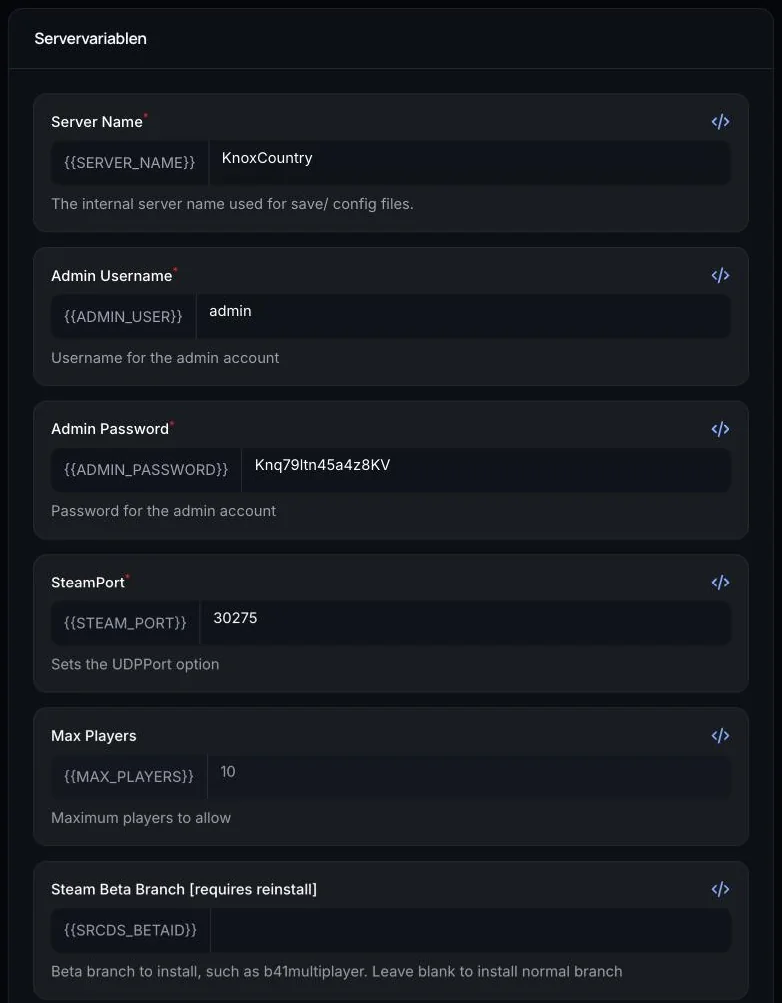
Important: don't change the Server Name after you have started playing. With a new name, the server looks for different files and starts an empty world. The Max Players field is for display only – the actual player limit is set in the settings file (step 4).
3. Connect to the server
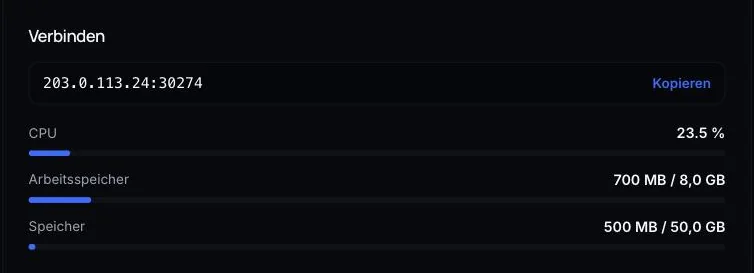
- In the Quick controls, copy the IP and port from the Connect card.
- Start Project Zomboid, click Join and open the Favorites tab.
- Enter the IP and port, and choose a username and password for your player account. The server creates the account the first time you join.
- Save the entry, select it and join.
If you want to play as an admin, use the Admin Username and Admin Password from the Startup page when you join.
4. Settings in the server files
Project Zomboid stores its settings in files. On AeonHost they are in the panel under Files, in the folder .cache/Server. They are named after your Server Name, for example KnoxCountry:
KnoxCountry.ini– server settings such asPublicName(name in the server list),Password(join password),MaxPlayers, PvP and mods.KnoxCountry_SandboxVars.lua– the game rules: zombie count, loot, day length, experience and more.
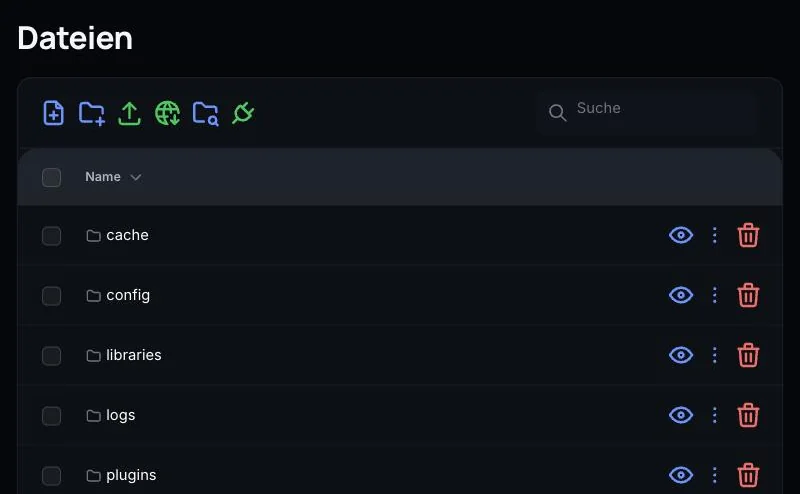
To change them safely:
- First create a backup (step 7).
- Stop the server.
- Open the file under Files, change the values and save.
- Start the server.
You don't need to change the port lines – the ports come from the panel at startup. Setting up the Project Zomboid sandbox explains what the individual sandbox values mean.
5. Add Workshop mods
Each mod needs two values. Both go in the .ini file:
- Workshop ID – the number at the end of the Workshop address (
?id=…). It goes on theWorkshopItems=line. This tells the server to download the mod. - Mod ID – a name chosen by the author. It is usually listed at the bottom of the Workshop description as “Mod ID”. It goes on the
Mods=line. This activates the mod.
Separate multiple entries with a semicolon, without spaces:
WorkshopItems=1234567890;2345678901
Mods=ExampleModA;ExampleModB
The numbers and names above are only placeholders. A Workshop page can contain several mod IDs – in that case, enter all the ones you want to use. Save, restart the server, and you're done. More on this: Entering Workshop mod IDs correctly and Workshop updates without hassle.
6. Admin commands
As an admin, enter commands in the chat with a leading /, and in the panel's Console without the /. Names and text go in quotation marks. The most important ones, according to PZwiki:
/setaccesslevel "Name" "moderator"– grants rights. Levels:user,priority,observer,gm,moderator,admin./kickuser "Name"– kicks a player off the server./banuser "Name"and/unbanuser "Name"– ban and unban./players– shows all connected players./servermsg "Restart in 5 minutes"– message to all./save– saves the world immediately./setpassword "admin" "NewPassword"– changes an account's password, for example your admin account.
How to assign moderators properly: Users and admin rights.
7. Backups and daily restart
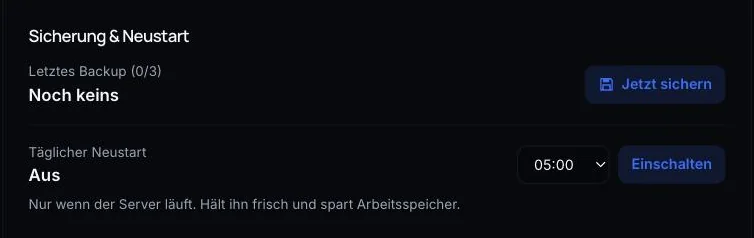
In the Quick controls, click Back up now, or create a backup under Backups in the panel – before every change to mods or settings. On the same card, set up a daily restart. Together with Steam Auto Update, this keeps the server up to date automatically.
Common problems
Players get “Version Mismatch” or a version error
The game has been updated, but the server has not been yet. Set Steam Auto Update under Startup to 1 and restart the server.
Mods don't load
The Workshop ID only downloads the mod. It becomes active only with the matching mod ID in Mods=. Check the spelling carefully and restart. If an error remains, the console shows at startup which mod is failing.
My changes to the .ini file are gone
You probably edited the file while the server was running. The server can then overwrite it with the values it has loaded. So stop the server before you edit.
I can't get in as an admin
When you join, log in with exactly the Admin Username and Admin Password from Startup. If you changed the password in the game with /setpassword, the new one applies.
The world is empty after renaming
The save game is tied to the Server Name. Enter the old name again and restart – the world will be back.
Further reading
Did this guide help? We are happy to help personally.